Written by Peter Honan
When you were growing up were you the type of kid that loved to take things apart? (And if you’re a Technology teacher you probably were!) Do you have students that like to take things apart? This article describes a structured, inexpensive and engaging activity that can be used in any modular technology education classroom and draws upon this urge to disassemble and uses it as a tool for motivation and learning.
Through this module students can learn how to use a soldering iron, how to identify electronic components, some basic principles of electronic circuit operation and the idea of piecework,-that is, being paid by how much product you produce instead of by how much time you work. Plus this is all done at the cost of a few soldering irons, a few vises and needle nose pliers.
A fancy name for taking things apart is Reverse Engineering and it was one of the reasons for Japan’s rise as a manufacturing and industrial power after World War II. Reverse Engineering involved taking apart a finished product piece by piece in order to learn how it was designed and produced. This was done with American cars, appliances and electronic components. By doing this, the Japanese learned how American products were made and how to make them better. This idea of learning through disassembly can be applied in the Technology Education classroom through a reverse engineering module. I came up with the idea of a Reverse Engineering module during my first year of teaching Industrial Technology. I was scrambling trying to come up with modules that were both engaging and educational. I also had little or no money to spend so it would have to be something that would be very inexpensive.
I thought back to something I used to like to do when I was a teenager. A friend and I were very much into electronics then and we would scavenge our neighborhood looking for old discarded TVs or stereos to fix or take apart. We didn't have the expertise to do much fixing but we were always able to take apart anything we could get our hands on. Doing this we learned the resistor color code, what capacitors, transistors and transformers looked like and how they worked, how electronic devices were put together and how to use a soldering iron.
The first thing you need is non-working electronic components to take apart. There are many sources for these. Most of us have old electronic appliances like radios or TVs or stereos that don’t work anymore. These can be used plus an announcement can be put in the Staff Bulletin asking the other teachers at your school to donate their old stuff.
1) The electronic repair person or department for your school district. Finding this person or department may take a little searching since they go under different names in different districts such as Media Services or Audio-Visual Services or Repair. It may often seem like trying to find a missing person, but somewhere in your district there is someone who is responsible for fixing, or arranging to have fixed, all the electronic equipment the district owns and uses. This person usually has non-repairable electronic stuff that is just taking up room in his shop or department and is usually happy to donate it once you explain what you’re going to use it for.
2) Your school district may have a Technology coordinator or advisor that may be able to suggest local companies or organizations that have used equipment they may be able to donate.
3) Your local municipalities’ Waste Disposal department. .
Many municipalities’ Trash Disposal Department (or the company that disposes it for them,) will salvage and recycle old computer equipment and may not want to part with it but they usually can’t recycle everything. For example the company that handles recycling for the city that I live in resells the complete circuit boards to all the computers they salvage much like a junk yard would sell parts of old cars. But they had no use for older computer monitors so they would give me all they had. Monitors have a few circuit boards in them and I was usually able to sneak in instruction on how TVs work by talking about how the monitor’s picture tube works.
4) Advertising in the Wanted section of a local newspaper. An advertisement describing yourself and what you want the equipment for will usually yield enough calls to keep your classes supplied with enough stuff to take apart. Just make sure to specify non-working electronic equipment in the ad and offer to pick up the stuff yourself since people will usually not bring it to you even when they say they will.
Never be afraid to take old equipment since the parts they use are generally large and easier for the kids to work with.
The actual procedure for disassembling parts is as follows. First the student usually starts with a circuit board that is placed in a vise to hold it securely while he or she is removing parts. Care must be taken to clamp the vise on just the circuit board and not on any parts connected to it. Then the student identifies the part he or she wishes to remove. Then with the soldering iron in one hand and the needle nose pliers in the other, they grab the part with the pliers on one side of the board and apply the soldering iron to the solder connection on the other side of the board. When the solder connection is melted the part can be removed from the circuit board by gently pulling it away from the board. It is best to hold the part by the wire connecting it to the circuit board rather than the body of the part since the pliers will sometimes damage the part if too much pressure is applied. It’s also a good idea to buy plenty of extra soldering tips for the soldering irons and change the tips fairly often since students tend to press too hard on the iron and bend and break the soldering tip. It’s very,very difficult to repair a soldering iron with a broken tip and a new tip is much less likely to bend and break.
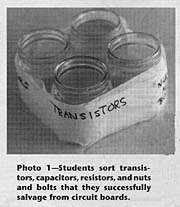
My first problem was how to evaluate student’s work. Since I use the point system in my grading, I decided to give one point for each transistor, capacitor, resistor and nut or bolt that the students were able to salvage. I taped four baby food jars together and labeled one Resistors, one Capacitors, one Transistors and one Nuts and Bolts. (See Fig. 1) At first I would only count the parts at the end of the week but after a few days the jars would fill to overflowing so I would have to count and empty them on a daily basis. This became a tedious and time consuming task considering I had four different classes to keep track of.
I eventually gave the task to one of my TAs but he had a tendency to do it in a rushed and sloppy manner and I would occasionally have to remind him that student’s grades depended on how accurately he counted parts and recorded points and that he had to take his time to do the job right.
One advantage of tallying the points every day was that students could keep track of their points earned and compare their output to the other periods. I updated their totals on a daily basis on a 2’ by 3’ white board titled Reverse Engineering Point Totals (see Fig. 2).
Competing against the other periods was a real incentive for some students and to increase that incentive I would award an extra 50 points to the period with the most points. In all of the other modules, students can earn a maximum of 200 points, but in Reverse Engineering they can earn as many points as their desire and ability allow. I use this to communicate the idea of piecework, where a worker is paid by how many products he produces and not by how much time he works.
The Reverse Engineering module is an engaging hands-on activity that helps students learn basic principles of circuit operation, how to identify electronic components, use a soldering iron,what piecework is, and helps develop the hand-eye coordination needed to work in electronic assembly, maintenance and repair. It will enable you to take the things around you that you thought were useless and obsolete and convert them into something that students can learn from.
by Peter Honan